Chrono Cross Demo
General Information
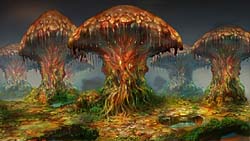
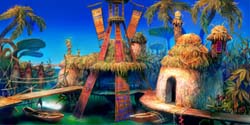
Before the official release of Chrono Cross, Square Enix marketed a PlayStation release of Chrono Trigger and attached a demo of the game to it and Legend of Mana. The demo included several scenes which later were released as a preview video by American reviewers (such as IGN and Gamespot), ending with the famous tag line "THE CLOCK RESTARTS 1999". This demo has allowed a short look into the late stages of the development of Chrono Cross, offering a few prizes such as a scrapped facial portrait of Kid and missing playable characters. The entire experience is presented here, along with unused art for the game posted by Yasuyuki Honne (the art director) on his blog.
See also Chrono Cross NTSC Beta, Chrono Trigger 2 Promo Video, and Chrono Cross Prerelease Coverage.
DOWNLOAD THE DEMO USING THIS LINK: Square's Preview Volume 5 (ISO, 519 MB)
DOWNLOAD CERTAIN EXTRACTED FILES HERE: Chrono Cross Demo Random Files (by utunnels)
Introduction and Gameplay
The demo was packed in a demo disc containing previews of Vagrant Story, Front Mission 3, Dewprism (better known to English audiences as Threads of Fate), and tips / hints for current SE games. Players who loaded the disc would find this selection screen:
CHRONO CROSS

Planned for release in winter of ’99
Upon selecting Chrono Cross, the player would be greeted by Mitsuda's Beginning of a Dream with the classic underwater sequence. However, it segues to an overall shot of El Nido for the actual title screen.
The dream of the planet repelled the darkness and
birthed a new future. However, that was also the beginning
of a new nightmare… The time-transcending final battle
between dragons, humans, and destiny that surrounding
the legendary treasure, the Frozen Flame, had begun…

The dream of the planet is not yet over…
Pressing start brings the player to a short introductory sequence with two screens of text. Below are images of the first screen with and without the background and the second screen.
You cannot solve the world’s riddles and heal
its sadness alone.

But even so…
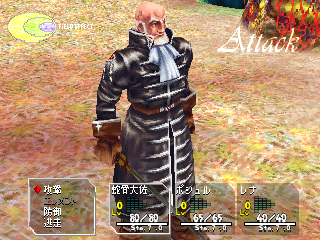
One can see slightly different portraits of Razzly, Glenn and Leena. These only differ by a pixel or two, or by the perspective. However, Kid's portrait is markedly different. The journey begins in Fort Dragonia. Kid and Glenn (and it is always Glenn) go through the usual motions. The crystal in the protective room is white, rather than purple, and a Cat Burglar harasses the party along with Cybots. Both these enemies can run faster than usual to catch the party as it tries to pass them.
Serge's Swallow is tinted green and looks like the Mastermune.
Defending the white crystal is a Sidesteppa.
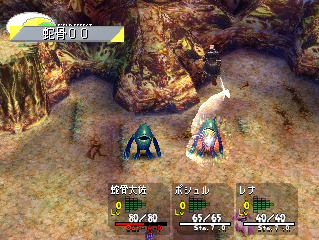
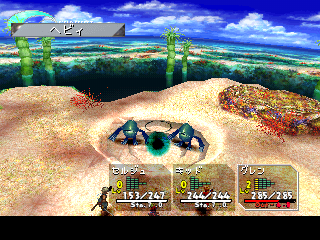
In combat, the Elements appear to have less sophisticated animations. For instance, Serge's MeteorShower summons two simple white orbs. Between Life and Death plays in all battles, regular or boss.
Their starting elements are:
| Level 1 | Level 2 | Level 3 | Level 4 | Level 5 |
|---|---|---|---|---|
| Leaf (Bushwhacker) | ||||
| Uplift | Shooting (Meteorite) | Photon(Beam) | ||
| AquaBeam | AquaBeam+1 | AquaBall | (empty) | |
| Laser (PhotonRay) | Laser+1 | Dash&Slash | Comet (Meteor Shower) | (empty) |
| Cure | IceLance | Keara (CurePlus) | (empty) | |
| Revive | AeroSaucer | Capsule x5 | ||
| Tablet x5 |
| Level 1 | Level 2 | Level 3 | Level 4 | Level 5 |
|---|---|---|---|---|
| Laser | ||||
| Leaf | AeroSaucer | (empty) | ||
| Fireball | Fireball+1 | (empty) | (empty) | |
| (Magma)Bomb-1 | Bomb | Burning (FirePillar) | Melt Stone (MagmaBurst) | (empty) |
| Cure | Uplift+1 | Capsule x5 | (empty) | |
| Cure | Cure+1 | (empty) | ||
| Tablet x5 |
| Level 1 | Level 2 | Level 3 | Level 4 | Level 5 |
|---|---|---|---|---|
| (empty) | ||||
| Leaf | (empty) | (empty) | ||
| Leaf | Leaf+1 | (empty) | (empty) | |
| AeroSaucer-1 | AeroSaucer | Dash&Gash | Freeze (IceBlast) | (empty) |
| Cure | Cure+1 | Capsule x5 | (empty) | |
| Cure | Cure+1 | Capsule x5 | ||
| Tablet x5 |
Once the Fort Dragonia sequence is concluded, Serge wakes up in Arni and is instructed to find Leena as usual. Una has no portrait, hampering the suggestion that she was once planned to be a playable character.
Una: Do your best, Mr. Serge! For me!
The fisherman stops Serge from accessing Radius.
Hoy, Serge. There’s an important visitor coming to the mayor’s today. Don’t get in the way!
Outside Arni, one cannot access the Divine Dragon Falls. Cape Howl is seemingly unchanged, and two Porre sergeants block off Fossil Valley.
For eternal memories
The summer of our 12th year
Serge
Lena
The Hydra Marshes seem unguarded as first, as in the normal game a man from Arni blocks access. However, if one tries to enter, Razzly appears and speaks at length. The marshes are also slightly different in that a waterfall exists to the upper left of the initial screen.
Razzly: Hey, Serge! I’m Razzly.

The mean old dwarves live here in the Hydra Marshes. If they catch me, I’ll be in trouble.

Razzly: Unfortunately, in this demo version, this is where my part ends!

Razzly: It’s sad… but there’s nothing I can do.

Razzly: Well, see you later, Serge!
At Lizard Rock, Kid and Glenn join the party upon Serge's entrance to help collect scales.
Kid: Yo, Serge. You’re late.

Oh, I get it, it’s not time for our debut yet, right?

But you’re all alone, so I gotta worry. We’ll stick with you for awhile.

Glenn: You came to catch Komodo Pups, right?

Kid: No more foolin’. No matter where you go, enemies won’t dare show their faces with me around!
Opah Fish replace BeachBums in certain areas.
Glenn and Kid provide help along the way.
Glenn: Great, that makes 3 scales that we’ve collected.

Kid: Didn’t you have someone to meet at Opassa Beach? Let’s get going.

A date with Lena? Wow, hot!
Once the scales are collected, Serge will encounter a Mama Komodo only if he attempts to leave Lizard Rock. Following its defeat, Glenn and Kid withdraw.
- Withdrawal Dialogue 1
- Withdrawal Dialogue 2
- Withdrawal Dialogue 3
- Withdrawal Dialogue 4
- Withdrawal Dialogue 5
- Withdrawal Dialogue 6
Kid: Well, this is where we say goodbye.

We won’t get in your way anymore. Heh heh.

Glenn: See you again, Serge.

Glenn: Later.

Kid: Bye, Serge. Take care.

Whaaat, 1000 years is no more than a blink if you’re friends forever.
Demo Scenes
As Serge and Leena sit on Opassa Beach, Kid calls across the dimensions as usual. Just before the crossing begins, the game transitions to an extended series of scenes. These scenes were later recorded and used as a preview movie by certain reviewers and gaming sites. Of note, Riddel is in the Viper Manor library, Lucca's portrait is slightly different, and Gato cannot be found in the burning orphanage.
- Running through Shadow Forest
- Zoah Prepares to Fight
- Sneaking in to Viper Manor
- The Acacia Dragoons at Viper Manor
- Karsh Speaks
- Marcy Speaks
- Viper Speaks 1
- Viper Speaks 2
- Dragoon Answer
- Serge Enters the Foyer
- Running Across the Bridge
- Riddel at the Library
- Riddel Speaks 1
- Riddel Speaks 2
- Riddel Speaks 3
- Riddel Speaks 4
- Facing the Giant Hydra Marshes Dwarf
- Entering the Hydra Marshes 1
- Entering the Hydra Marshes 2
- Facing the Hydra
- Burning Orphanage with Bats
- Burning Orphanage 2
- Burning Orphanage 3
- Burning Orphanage 4
- Burning Orphanage 5
- Viper's Statue in Termina 1
- Korcha Escapes
- Viper's Statue in Termina 2
- Near the S.S. Invincible
- Cape Howl Sunset
Zoah: Welcome, kid! You’ve got guts to challenge me!

Karsh: Captain, it’s finally time for the Acacia Dragoons
to make an appearance…!

Marcy: Is it okay if we kill them all?

General Viper: Hmm…

General Viper: After the fall of Guardia, we’ll give those
arrogant Porre fools a shock!

Whoa!! Lord Viper!

Zoah: Whoa!!

Riddel: That’s right… you’re Serge.

Riddel: The world of humans will soon welcome the end.

Riddel: At that time, Serge, you will become the world’s
enemy, and it will become yours.

Riddel: That is not a guess, nor a prophecy.

Children’s drawings line the walls.

“Call me Big Sis.”

It’s said that the El Nido Islands were once ruled by six
great dragons.

The final battle between dragons, humans, and destiny is
beginning… Whose side will you be on, Serge?

To our beloved son, Serge
Rest in Peace
7 years old

No longer may anyone steal from this child. No one may
anyone give to this child.

We merely return to the sea what it has sent to us.
~
Debug Room
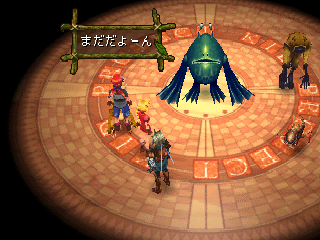
Room 0 in the Chrono Cross demo is a debug room:
Warp?
-Cross fingers
-By number
-By name
-Go to each developer’s room
yaz0r has discussed what the characters do:
"About that debug room, the character on the left allows you to modify the current party composition. As most of the characters are not present in the demo data, it will crash if you try to add to the party an character missing from the demo. The character in the center is the "go anywhere" character. First choice is go to room by ID; second is go to room by place name (like Arni Village A / Arni Village B). The last choice let you go to the planner's room (not present in the demo data). The top right character is a shortcut to the planners room list. And finally, the bottom right is the sound test character that allows to test music and sound effects.
"I'm not sure the debug room can actually be reinserted into the main game data. The reason is that the debug room text is Japanese and may not work at all in the US build of the game. And if it somehow worked, the text would probably be completely unreadable (there is no Japanese font in CC US AFAIK). So all the text for that room would have to be rewritten. Also, don't forget that this debug room was taken from the middle of the development of CC. Not all characters (and probably places) were finalized yet and later modification would not be present in the debug room. So, reinserting this debug room is probably technically possible, but would require a lot of modifications for it to properly work. So it will never be the "real thing".
You can download a savestate to use with ePSXe and enter the debug room:
TCRF Investigation
The following is from The Cutting Room Floor (here), which has a mutual sharing agreement on Chrono series material. The Chrono Cross debug room managed to survive the conversion to the demo. While it's not entirely functional due to most of the game's data being shaved off for the demo, most of the options are fairly explicit in their descriptions (assuming you understand Japanese)...unlike the debug room from, say, Final Fantasy VII.
CusCus
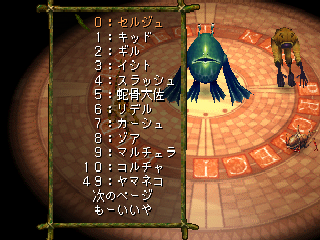
Option 1: Cancel Option 2: Member composition (Does nothing)
(Dialog: Already do~~ne)
Option 3: Party composition (only members in bold will not crash the game)
- 0: Serge
- 1: Kid
- 2: Guile
- 3: Norris
- 4. Nikki
- 5. Viper
- 6. Riddel
- 7. Karsh
- 8. Zoah
- 9. Marcy
- 10. Korcha
- 49. Lynx
- Next Page
- Cancel
(Note that Guile's name here is listed as Magil, an artifact from when he was Magus from Chrono Trigger. His character data was overwritten with Glenn's, so you will get a Glenn clone if added to the party).
- 11. Luccia
- 12. Poshul
- 13. Razzly
- 14. Zappa
- 15. Orcha
- 16. Radius
- 17. Fargo
- 18. Macha
- 19. Glenn
- 20. Leena
- 21. Miki
- Next Page
- Previous Page
- 22. Harle
- 23. Janice
- 24. Draggy
- 25. Starky
- 26. Sprigg
- 27. Mojo
- 28. Turnip
- 29. NeoFio
- 30. Greco
- 31. Skelly
- 32. Funguy
- Next Page
- Previous Page
- 33. Irenes
- 34. Mel
- 35. Leah
- 36. Van
- 37. Sneff
- 38. Steena
- 39. Doc
- 40. Grobyc
- 41. Pierre
- 42. Orlha
- 43. C13???base (Pip)
- Next Page
- Previous Page
- 44. C13???a (Devil Pip)
- 45. C13???b (Angel Pip)
- 46. C13???aa (Archdevil Pip)
- 47. C13???ab (Holy Beast Pip)
- 48. C13???bb (Archangel Pip)
- 49. Lynx
- 50. Glenn 2
- Previous Page
(Lynx will not function as Lynx, instead giving a Serge clone and causing graphical glitches.)
BeachBum
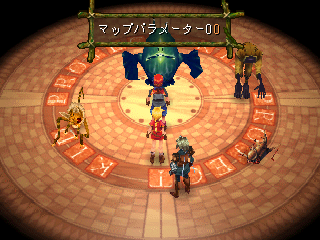
"Jump maps?"
- Cross yer fingers
- By number
- By name
- Go to every sub-room
"Map number"
"Map parameter"
Option 3: Map select menu. Only maps included in the demo can be visited, and the exits don't seem to function. The only location normally inaccessible with any sort of functionality is Termina B.
- Cancel
- Village, block A
- Village, block B
- Dungeon A
- Dungeon B
- World Map A
- World Map B
- Cancel
The rest of the menu consists of "go to (someone's surname)'s place" -- i.e., it's a list of stuff divided by name of the staffer who was in charge of putting it together.
Wraith
Same as BeachBum's 4th option.
Gerridae
Music test
- Song
- Permanent sound effects
- Cancel
"Number entry"
- Stop music
- Return
- Cancel
"Number entry"
- One more time
- Stop permanent sound effects
- Return
- Cancel
Using the Debug Room
Although the data was stripped to the bone for the preview, there are a few things that can be done with the debug room normally not possible in the demo.
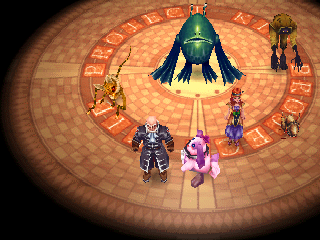
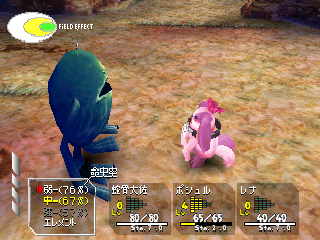
Viper, Poshul, and Leena are fully playable in the demo using the party select, as their graphical data was not deleted. Despite having models in the demo, Zoah, Karsh, Marcy, Radius, Razzly, and Riddel are not playable and will crash the game if added to the party. All three valid party members have a placeholder element grid full of some very preliminary elements, which is identical except for their Level 3 and 5 techs:
| Level 1 | Level 2 | Level 3 | Level 4 | Level 5 |
|---|---|---|---|---|
| Photon-2 | ||||
| Intel Down | Laser+1 | Holy-2 | ||
| Laser | PowerGain+1 | Revive+2 | Curest-2 | |
| Cure | FieldWhite+1 | (Level 3 tech) | Monocle+3 | (Level 5 tech) |
| Fireball | PowerUp+1 | Purify+2 | Holy-1 | |
| PowerDown | StepDown+1 | Drug-3 (Nostrum-3)x0 | ||
| EagleEye |
Viper is essentially the same as he is in the final. When added to the party, he's very weak compared to the demo version of Serge, Kid and Glenn, who were powered up along with the demo's critters. He's equipped with a Bone Sword and bone Armor.
His Level 3 tech is partially functional, unlike Poshul and Leena's. He will jump in the air, spin around and slash his target, inflicting heavy damage. His model will stay in the air above the enemy for the rest of the battle after performing the attack. His level 5 tech fires a powerful yellow-elemental AquaRay at the target.
Poshul is similarly weak, and equipped with Bone Armor and a Bone Fang (in the final, he uses Glove weapons, and 'Fang' weapons don't exist). Attacking results in a placeholder sound effect of a woman's voice, saying "Zero", "One" through at least "Five" depending on which effect is supposed to play. Neither of Poshul's personal elements are complete, and both function as yellow-elemental AquaRays.
Leena is equipped with Bone Armor and a Bone Pan, which is untextured (likely because the texture was cut for the demo). However, it still clips through her head partially. Like Poshul her level 3 and 5 techs are AquaRays, though blue element in her case. Unlike the other playable characters she doesn't have a proper casting animation for AquaRay and will bend over backwards when using it.
Debug Functions
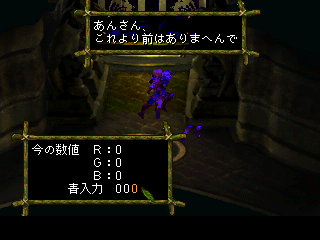
There are some hidden debug functions which can be activated with GameShark. Known codes are unstable, barely functional, and buggy at this point.
top window: "ansan, kore yori mae wa arimahende"
bottom window: Current value
- R : 0
- G : 0
- B : 0
Blue entry 000
bottom window: Current value
- R : 0
- G : 0
- B : 0
Green entry 000
top window:
- mode : 0
- R : 0
- G : 0
- B : 0
Blue entry 000
bottom window: Current value
- R : 0
- G : 0
- B : 0
Blue entry 000
bottom window: Current value
- X : 0
- Y : 0
- Z : 0
rotx 0000
Top window:
- Before jump
- Go to individual sub-rooms
- Special
Bottom window: 0 Exception to your current space, yannow.
- Mess with the screen RGB
- Mess with the underwater RGB
- Mess with the character RGB
- Mess with the character rotation
- Mess with the scale
- 'Recto'(?) set
- Return
- Cancel
Top:
Tokage region - south
Center: Where would you like to restart from?
- X coordinates : 0
- Y coordinates : 0
- current map : 0
- current height(?) : 0
- initiate test
- cancel test
Bottom: Alny Village
Script
- Chrono Cross Demo Room Scripts by Vehek, utunnels, yaz0r
Magil Note
It's important to note that in the debug room's character list, "Gil" appears (this was the name of Magil in Radical Dreamers):
+---------------+
| text   eh  14 |
+---------------+
   {text speed ff}0:セルジュ
   1:キッド
   2:ギル (ed. note: this is "Gil")
   3:イシト
   4:スラッシュ
   5:蛇骨大佐
   6:リデル
   7:カーシュ
   8:ゾア
   9:マルチェラ
  10:コルチャ
  49:ヤマネコ
   次のページ
   もーいいや{end}
This is a relic of the development period in which Guile was still intended to be Magus in disguise. Thanks to utunnels and yaz0r for tracking this down.
For an overview of the unlocked debug functions as they appear when used, see this video.
Music Differences
The sound test function lets us compare music differences. As a rule, music in the demo sounds slightly crappier that what was used in the final, mainly due to the addition of superior mixing and reverb during development. Tracks from the demo all have an annoying fade-in which is unavoidable both in gameplay and the soundtest. The samples here from the final version are taken from the game and not the soundtrack, as the soundtrack versions sound a little 'remastered'.
| {{#if: Demo | Demo | Prototype }} | {{#switch: horizontal | vertical1 =|
|---|---|
| 300px | |
| {{#if: Final | Final | Final }} | {{#switch: horizontal | vertical2 = | #default =|
| 300px | }}300px |
This is played on the demo's title screen as the audio component of an FMV that isn't present in the final at all. An updated version appeared on the game's official soundtrack.
| {{#if: Demo | Demo | Prototype }} | {{#switch: horizontal | vertical1 =|
|---|---|
| 300px | |
| {{#if: Final | Final | Final }} | {{#switch: horizontal | vertical2 = | #default =|
| 300px | }}300px |
| {{#if: Demo | Demo | Prototype }} | {{#switch: horizontal | vertical1 =|
|---|---|
| 300px | |
| {{#if: Final | Final | Final }} | {{#switch: horizontal | vertical2 = | #default =|
| 300px | }}300px |
This one can only be heard through the sound test in the debug room. It doesn't loop.
| {{#if: Demo | Demo | Prototype }} | {{#switch: horizontal | vertical1 =|
|---|---|
| 300px | |
| {{#if: Final | Final | Final }} | {{#switch: horizontal | vertical2 = | #default =|
| 300px | }}300px |
| {{#if: Demo | Demo | Prototype }} | {{#switch: horizontal | vertical1 =|
|---|---|
| 300px | |
| {{#if: Final | Final | Final }} | {{#switch: horizontal | vertical2 = | #default =|
| 300px | }}300px |
The demo version is missing the tambourine and chanting right before the loop.
| {{#if: Demo | Demo | Prototype }} | {{#switch: horizontal | vertical1 =|
|---|---|
| 300px | |
| {{#if: Final | Final | Final }} | {{#switch: horizontal | vertical2 = | #default =|
| 300px | }}300px |
The crash at 0:42 and the echoing percussion right before the loop are different.
| {{#if: Demo | Demo | Prototype }} | {{#switch: horizontal | vertical1 =|
|---|---|
| 300px | |
| {{#if: Final | Final | Final }} | {{#switch: horizontal | vertical2 = | #default =|
| 300px | }}300px |
Also accessible only through the music test. Sounds like there's another note to the bagpipes chords in the final, but it might just be the mixing.
| {{#if: Demo | Demo | Prototype }} | {{#switch: horizontal | vertical1 =|
|---|---|
| 300px | |
| {{#if: Final | Final | Final }} | {{#switch: horizontal | vertical2 = | #default =|
| 300px | }}300px |
Accessible only through the debug room music test. The guitar sounds a lot crappier in the demo.
| {{#if: Demo | Demo | Prototype }} | {{#switch: horizontal | vertical1 =|
|---|---|
| 300px | |
| {{#if: Final | Final | Final }} | {{#switch: horizontal | vertical2 = | #default =|
| 300px | }}300px |
| {{#if: Demo | Demo | Prototype }} | {{#switch: horizontal | vertical1 =|
|---|---|
| 300px | |
| {{#if: Final | Final | Final }} | {{#switch: horizontal | vertical2 = | #default =|
| 300px | }}300px |
| {{#if: Demo | Demo | Prototype }} | {{#switch: horizontal | vertical1 =|
|---|---|
| 300px | |
| {{#if: Final | Final | Final }} | {{#switch: horizontal | vertical2 = | #default =|
| 300px | }}300px |
The sitar was changed (for the better) between demo and final.
| {{#if: Demo | Demo | Prototype }} | {{#switch: horizontal | vertical1 =|
|---|---|
| 300px | |
| {{#if: Final | Final | Final }} | {{#switch: horizontal | vertical2 = | #default =|
| 300px | }}300px |
| {{#if: Demo | Demo | Prototype }} | {{#switch: horizontal | vertical1 =|
|---|---|
| 300px | |
| {{#if: Final | Final | Final }} | {{#switch: horizontal | vertical2 = | #default =|
| 300px | }}300px |
The instrumentation is completely different. The demo version uses samples that sound like they came from an SNES game.
Playing anything in the music test past track 11 will result in a sequence (usually the game over theme) being played with the instrument data of the most recently heard track, or possibly crash the game.
Kukuru Cut Character
In the demo, the level 3, 5, and 7 techniques of every character except Serge and Glenn('s level 3s) are named in the format [character name] 00, 01, or 02. While this isn't particularly enlightening for the characters who did make it in the final, it does reveal a character who didn't make the cut.
Elements 0601, 0701, and 0801 are named ククル00 (Kukuru) through ククル02. Using them yields the standard element placeholder effect of a low-damaging AquaRay on a single target, but with Kukuru's green innate. She is placed between Mel and Leah in the roster, which would explain the presence of a demo character portrait between the two where there are no members in the final.
Since the only evidence that this character ever existed are a few placeholders, it's safe to say that she probably didn't make it very far into development before getting axed. See her level three Element below:
Monster Stats
Refer to this thread.
Graphical Differences
Characters
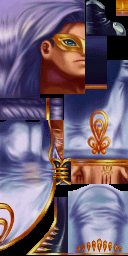
More information is available upon examining the game's textures.
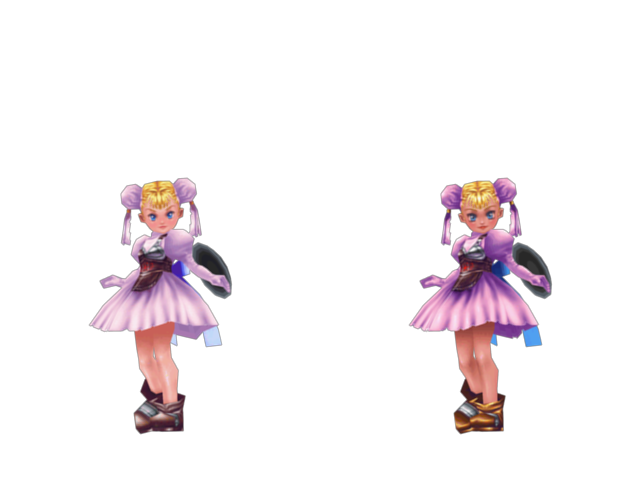
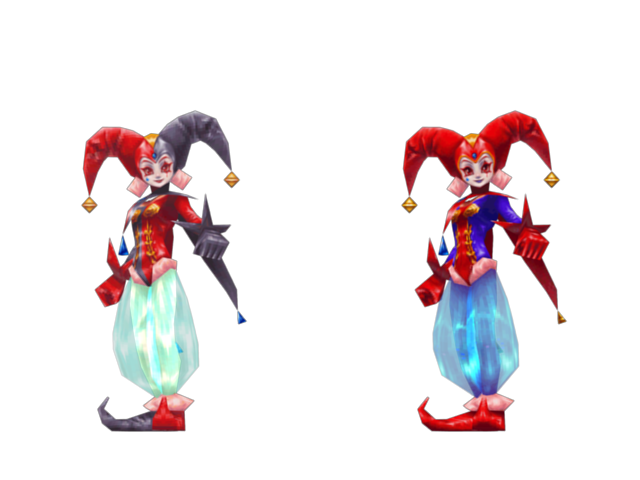
The most glaring difference is the presence of a seemingly new character in Pierre's slot. Since Pierre's dialogue icon was already in its final state, it's probable that this was an earlier design for Pierre. One suggestion is that it's based off an adult version of Tata, who Masato Kato revealed in an interview to be the inspiration for Pierre (a whacked-out fake hero). Nikki has a slightly visible nipple (gone in the final), and some of the characters appear only as rough sketches or alternate versions (including Orlha, Skelly, and Turnip). On the other hand, some characters appear as black and white sketches (Starky and Orcha), but in their final art form (just without color). By comparing to the order of the art textures in the final version, we find that
- Macha was stuck in between Fargo and Glenn
- 23 - Janice
- 24 - Draggy
- 27 - Mojo
- 29 - Neo-Fio
- 32 - Funguy
- 33 - Irenes
- 35 - DELETED, or perhaps Macha's old position
- 39 - Steena
- A prototype Pierre
- Pip's placeholder looks like a different character entirely, and his name isn't present (there's just a "C" character placeholder in the script)
We can then examine the dialogue art.
It seems possible that slot 29 (Neo-Fio in the final) may have originally been a Quadffid, or that the Quadffid is a placeholder. The name per the script is 改良ラブルー. Also, a Beach Bum or Nu appears at the end of the player character images (before the "null" symbol). Interestingly, a crazy old man seemingly in El Nido garb is in Belthasar's place. Perhaps Belthasar was originally stationed at Guldove, and tried to fit in with the locals or pass himself off as an El Nido prophet? At any rate, he's missing his trademark eyebrows. Lisa the Elements trader appears as a sketch. Much of the other colored, rough art appears in Missing Piece in full form. Examining and totaling the other icons and art, the characters below may have been planned and scrapped at one time for Chrono Cross. Remember that this is speculation, as these characters may have just been planned to have dialogue art as NPCs (which was later scrapped).
- Prototype Pierre
- Strange old man / Belthasar prototype
- Quadffid (Neo-Fio placeholder)
- Nu (Pip placeholder)
- Ketchop
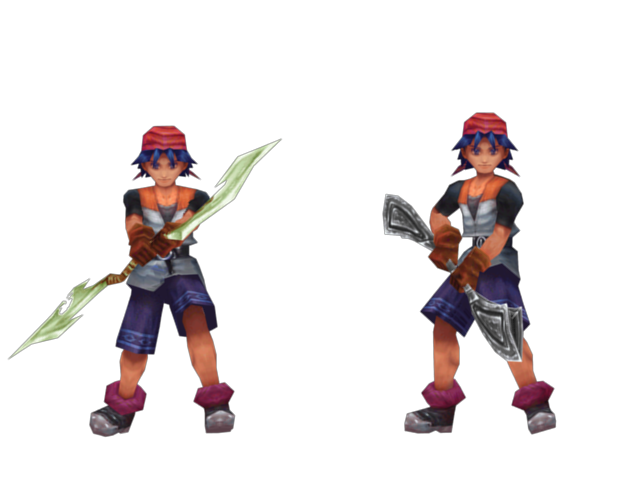
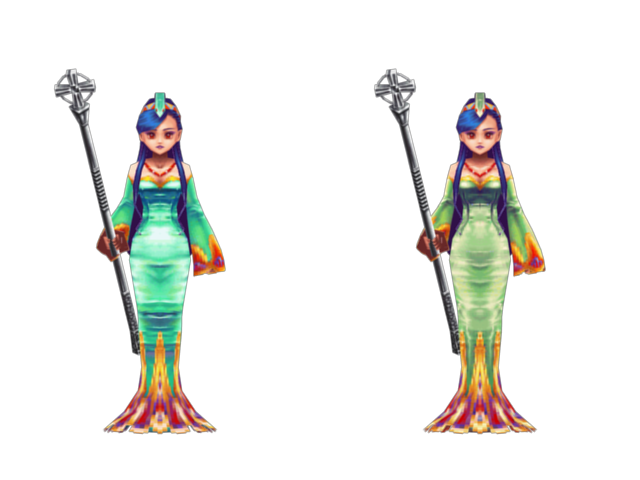
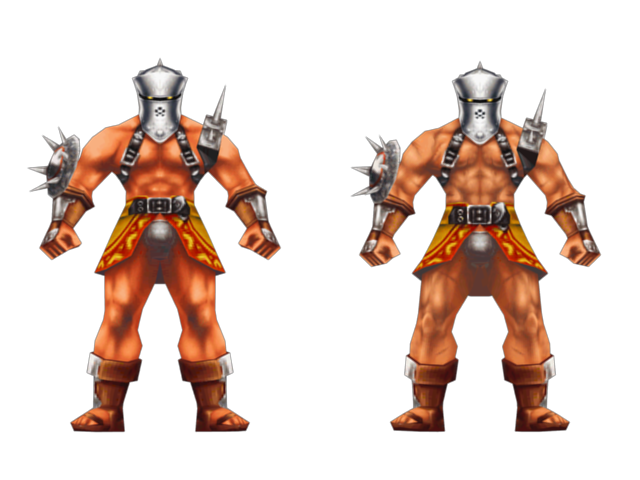
There are also several texture and stance differences between the two versions. utunnels painstakingly reviewed the stances and textures for each, providing the most notable differences below; in each case, the demo version of the character is on the left, while the final version is on the right:
Note that Doc's texture originally had the Star of David, the Jewish religious symbol, as a tattoo on his arm. It was probably removed for obvious reasons.
Elements
Three Elements have different graphics.
PhotonBeam
Iceberg
Gravitonne
Locations and Menus
Slot Machine
See Chrono Cross Slot Machine.
Music
As a rule, music in the demo sounds slightly crappier that what was used in the final, mainly due to the addition of superior mixing and reverb during development. Tracks from the demo all have an annoying fade-in which is unavoidable both in gameplay and the soundtest. Playing anything in the music test past track 11 will result in a sequence (usually the game over theme) being played with the instrument data of the most recently heard track, or possibly crash the game.
This one can only be heard through the sound test in the debug room. It doesn't loop.
The demo version is missing the tambourine and chanting right before the loop.
The crash at 0:42 and the echoing percussion right before the loop are different.
Also accessible only through the music test. Sounds like there's another note to the bagpipes chords in the final, but it might just be the mixing.
Accessible only through the debug room music test. The guitar sounds a lot crappier in the demo.
The sitar was changed (for the better) between demo and final.
The instrumentation is completely different. The demo version uses samples that sound like they came from an SNES game.
This is played on the demo's title screen as the audio component of an FMV that isn't present in the final at all. An updated version appeared on the game's official soundtrack.
Media
Dynamic Texture Pack
Through TIMViewer, the dynamic textures of the Chrono Cross Demo have been ripped and organized in this archive. They are divided into several categories. These TIM files, named "dynamic textures" by the community, include menu graphics, animated graphics, field map / overworld character model textures (not the high resolution model textures), and other miscellany. They do not include prerendered backgrounds, maps, or other large, static images in the game, which are stored in the ROM in a different format. For Final Fantasy 7, this format is known as "MIM". Currently, the format Chrono Cross's prerendered location backgrounds and other models are stored in is unknown. Any research or advice towards diagnosing this format and extracting the textures is very much appreciated.
Certain battle location / effect textures were unable to be identified in this archive; if you would like to assist, please open the "Unknown" folder within the locations folder and review the images. Post suggestions in this thread on the Compendium forums.
Chrono Cross V-Jump Preview Video
The Chrono Cross V-Jump Preview Video is part of V-Jump '99, and features brief comments by Masato Kato, Hiromichi Tanaka, and Hironobu Sakaguchi. It also features beta Viper Manor music, different from the traditional Viper Mansion music. Head to the linked page to download.
Unused Art
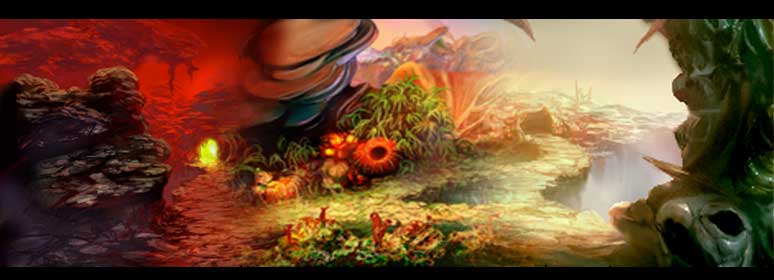
Yasuyuki Honne is the artist of the Chrono series, and made some background art that was never used in the final game. They strangely appeared in a GamePro online guide to the game which was later taken down; a couple examples also appear on Honne's blog. We were able to rescue four pics from the Wayback machine's archive of page 2 of the guide, but page 1 is lost. Honne does not specifically note that the examples from his page were intended for Cross, but the style matches up, and one of the pieces was used in the GamePro guide. A big thanks goes to Blik for researching this.
From Honne's Blog
From the Guide
A piece of art that strongly resembles the style of Chrono Cross's works appeared in magazines as a recruiting advertisement for Monolith Soft. It featured a blurb about Project X (Xenosaga), and a large vista resembling Cape Howl.
From: Games


