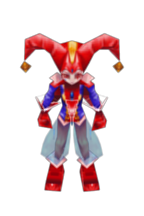
RMXP Walking Sprite Set Guide1. Open a .blend file in blenderI'm using blender 2.49b, though it is not the newest version, but already enough for this task. Blender 2.5x might be different in UI.
You can download it here:
http://www.blender.org/development/release-logs/blender-249/In this guide I use Harle for example.
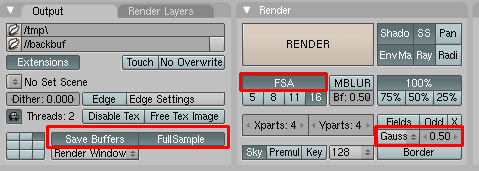
2. Change certain values in Render panelI marked them in red boxes. The
FSA option is the most important part,
DON"T use OSA, or else the result would be extremely ugly.
 3. Check your model, to find the walk frames
You can change the 3D View window to Textured, but its just optional, just for convenience.
Now change current frame to examine the model. I suggest you switch to
Side View by pressing 3 in your Num pad.
You'll need the idle frame (frame 2) and 6 frame of her walking animation. For quick reference, Harle's walk animation begins at frame 28 and has totally 14 frames.
 4. Copy the python script into the Text Editor and edit some lines
For those who don't know, here's where the Text Editor can be found.
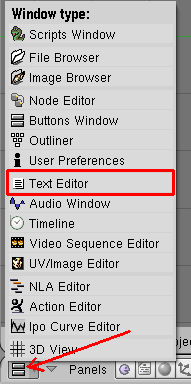
Once it is opened, right click and then
New to create a new Text. Then copy the script below to the Text Editor.
import Blender
from Blender import *
from Blender.Scene import Render
scn = Scene.GetCurrent()

scalefix = 9/8.0
mul=4
renderPath = "D:\\Chrono\\CC Models\\output\\temp"

camObj = scn.getCurrentCamera()
cam = camObj.getData()
cam.type = 'ortho'
cam.scale = 4.25*scalefix

context = scn.getRenderingContext()
context.enableRGBAColor()
context.enableOversampling(True)
context.OSALevel = 16
context.alphaMode = 1
context.enableGaussFilter(True)
context.gaussFilterSize(0.5)
context.imageType = Render.PNG
context.sizeX = int(32*mul*scalefix)
context.sizeY = int(48*mul*scalefix)
context.renderPath = renderPath

pi = 3.1415926535897932
frames = [2, 42, 44, 46, 48, 50, 52]

camObj.setLocation(-10.0, 0.0, 12.2)
camObj.setEuler(pi/4, 0, -pi/2)
for i in range(0, len(frames)):
    Blender.Set("curframe", frames[i])
    context.render()
    context.saveRenderedImage("2r" + str(i) + ".png")

camObj.setLocation(10.0, 0.0, 12.2)
camObj.setEuler(pi/4, 0, pi/2)
for i in range(0, len(frames)):
    Blender.Set("curframe", frames[i])
    context.render()
    context.saveRenderedImage("1l" + str(i) + ".png")

camObj.setLocation(0.0, 10.0, 12.2)
camObj.setEuler(pi/4, 0, pi)
for i in range(0, len(frames)):
    Blender.Set("curframe", frames[i])
    context.render()
    context.saveRenderedImage("3b" + str(i) + ".png")

camObj.setLocation(0.0, -10.0, 12.2)
camObj.setEuler(pi/4, 0, 0)
for i in range(0, len(frames)):
    Blender.Set("curframe", frames[i])
    context.render()
    context.saveRenderedImage("0f" + str(i) + ".png")
Here're the lines you might need to change:
scalefix = 9/8.0
mul=4
renderPath = "D:\\Chrono\\CC Models\\output\\temp\\"
scalefix is the size modifier, if your find your character outside the image border just give it a greater value. But usually you won't need to, 9/8 should be fine for regular characters.
mul is the output multiple, for example, your final product is 36x54, and you set mul to 4, you get a 144x216 image. Higher value gives better result, but I thnk 4 is enough, at least I can't see the difference between 4 and 10.
renderPath is your output path, where your images will be saved. I suppose you are using windows, hmm. Don't forget the last '
\\'.
Done? Congratulations, we are almost there, but we need to choose 7 frames (or whatever you like, you can use only 3 frames, or even all 14 walk frames plus the idle frame).
frames = [2, 30, 32, 34, 36, 38, 40]Edit this array according to your choices.
5. RenderJust right click inside the Text Editor and Execute Script. When blender is done, check your output folder, are your pretty images there?
 6. Combine and Edit the frames
I used Graphics Gale to combine the frames. You can download the English version here:
http://www.humanbalance.net/gale/us/download.htmlThe free version is enough for this task.
In your Gale, follow these steps:
File --> Import From Multiple Files --> Add --> (select all your images) --> OK --> File --> Export
In the Export window, choose "Combined Image", type 7 (or your frame count) in Columns. Then click OK, choose png as your output type, and don't forget to check "With alpha channel".
Now open the combined image. You can do that in photoshop, but Gale can do that task as well. Resize the image to 1/
mul of its size.
You may want to check your final product. For example, I will shift the idle frame 1 or 2 pixels to match the offset of the walking frames to make the walking animation smoother.
Tip: You can check the animation in Gale, simply choose "Import From Combined Image". Edit the frames using 'Image-->Scroll' function and then Export the new combined image.
Tip 2: Actually using the idle frame for the 1st frame of the walking animation is quite tricky in RM, for example, Harle put her hands over waist while walking, so the idle frame looks so sudden. But a skilled RM user can fix that by adding an actually idle animation, not to be discussed further here.
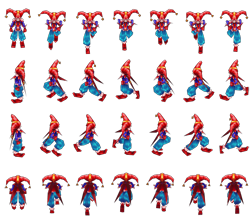
Idle + walk (Scaled in photoshop)
walk only (Scaled in Graphics Gale)
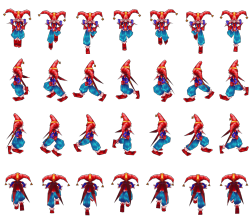
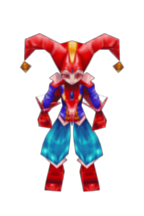
BTW, you may notice Harle's pants are semi-transparent. So you can edit the texture (save it to png and edit it in PS or Gale) to make them look better.
